This guide will take you through how to replace the power inlet for your Elite Series treadmill.
What will I need?
To undertake the replacement you will need:
1. Replacement power inlet.
2. Star screwdriver.
WarningThis repair does involve mains voltage so follow the instructions carefully.
Removal of the power inlet
Step 1: Turn off the treadmill by the wall and unplug the cable from the treadmill power socket and wait 20 mins for the capacitors to discharge.
Step 2: Remove the motor cover by removing the 4 retaining screws.
Step 3: Remove the power inlet by removing the 2 retaining screws.
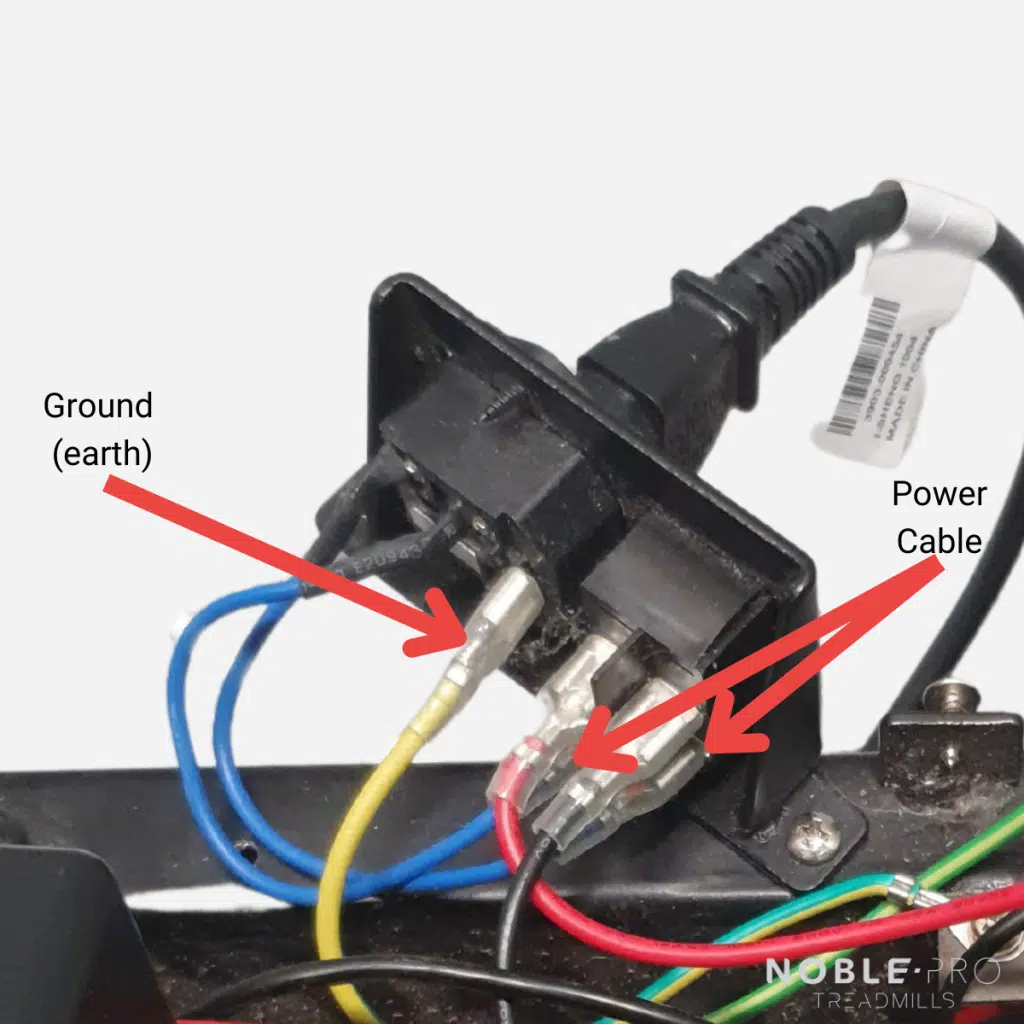
Step 4: Un-clip the earth wires which are attached to the power inlet.
Step 5: Un-clip the earth wires which are attached to the power inlet.
Top Tip: The use of a screwdriver to pry the connectors off.
Step 6: The power inlet should now be free to be removed.
Installing the new power inlet
The installation is the reverse of the removal process.
Step 7:Install the earth wires which are attached to the power inlet.
Step 8:Install the earth wires which are attached to the power inlet.
Step 9: Secure the power inlet using the 2 retaining screws.
Step 10: Install the motor cover by using the 4 retaining screws.
Step 11: Turn on the treadmill by the wall and plug the cable from the treadmill power socket.
Troubleshooting
Treadmill is not turning on > Ensure the power cable is plugged in, the power socket is on and the wall plug is on. If there are no LEDs showing on the motor controller during step 8, this indicates there is no electricity at the motor control board. Check all fuses (plugs and power sockets) and circuit breakers. If the issue persists use the user’s manual to troubleshoot.