This guide will walk you through how to fit a FTMS + Audio Bluetooth V3 module for NoblePro Elite E8.0 series treadmills.
These modules are FTMS compatible to allow connection to virtual foot pods, the sending of data to BLE HRM and Bluetooth audio in.
For further information on the capabilities of the FTMS + Audio Bluetooth V3 module please refer to this more detailed guide.
What will I need:
FTMS + Audio Bluetooth V3 module pack for E8.0
1 x white cable with blue connectors
2 x jump-overs (red clips)
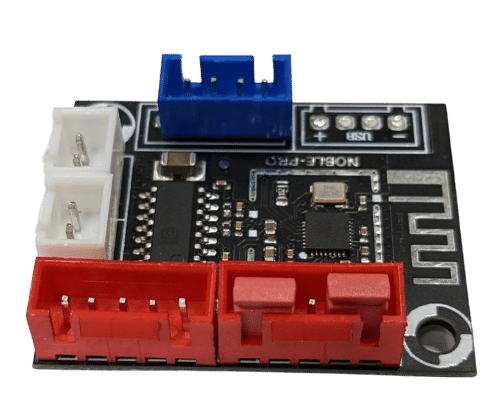
1 x black Bluetooth module
Screwdriver
If you need video assistance, please see the video below.
Prepare the new module
Step 1: Connect the supplier white cable with blue ends to the blue connector on the FTMS module.
Step 2: Install two jump-overs on the red connectors as per below:
Fitting the new module
Step 3: Unscrew the 7 screws from the back of the screen.
Step 4: The back of the screen will also be attached with a black/red cable that goes to the fan from the motherboard into a red clip. Please unclip this from the motherboard.
Step 5: Put the back of the screen to the side for now.
Step 5: Locate the old Bluetooth module that is screwed onto the back of the screen. This looks similar to the new Bluetooth module but it is light green or red.
Step 6: Remove all cables connected to the old module and unscrew it.
Step 7: Use the screw from the old module and fix the new module to the back of the screen.
Step 8: Remove the white cables from the speakers going to the old audio module and connect them to the white connectors on the new module.
Step 9: Install the other end of the white cable with blue connectors from the new module to the blue connector on the motherboard to which the old module was connected.
Finishing off
Step 10: Re-connect the back/red fan connector to the motherboard from step 4.
Step 11: Close the screen and fix the 7 screws from step 3.